Help
Table of Contents
- Dashboard and General Site Help
- Event List
- Event - Basic Info
- Event - Venues
- Event - Micro-Site
- Event - Upgrade
- Venue - Basic Info
- Venue - Meal Choices
- Venue - Tables
- Venue - Table Seating
- Venue - Place Cards
- Venue - Favors
- Venue - Favor Allocation
- Venue - Map
- Master Guest List
- Guest - Basic Info
- Guest - Additional Info
- Guest - Others in Group
- Category List
- Category - Basic Info
- Invitation Worksheet
- RSVP Worksheet
- Attendance Worksheet
- Hotel Stay Worksheet
- Transportation Worksheet
- Gift Worksheet
- Copy Guests From Another Event
- Import Guests From Excel
- Vendor List
- Vendor - Basic Info
- Vendor - Proposals
- Vendor - Payments
- Vendor - Documents
- Vendor Proposal - Basic Info
- Vendor Payment - Basic Info
- Vendor Document - Basic Info
- Budget
- Budget Category - Basic Info
- Copy Vendors From Another Event
- To-do Task List
- To-do Task - Basic Info
- Notes
- Calendar
- Report Specification
- Label Specification
- Envelope Specification
Dashboard and General Site Help
A guide to various elements and symbols found in the Party Planner software:
Page Header
![]() Click here to see your account information or to log out.
Click here to see your account information or to log out.
![]() Click the question mark to see help for the current page.
Click the question mark to see help for the current page.
![]() Click here to take a note pertaining to the current page.
Click here to take a note pertaining to the current page.
![]() A note exists for the current page - click the icon to view/edit it.
A note exists for the current page - click the icon to view/edit it.
![]() A note for the current page has a follow-up date that is past due - click the icon to view/edit it.
A note for the current page has a follow-up date that is past due - click the icon to view/edit it.
![]() A note for the current page has been marked complete - click the icon to view/edit it.
A note for the current page has been marked complete - click the icon to view/edit it.
 Click to see reports relevant to the current page.
Data Grids - Any changes you make directly in data grids are saved automatically - no need to click the "Save" button, and most grids don't even have a "Save" button.
 Click to add a new record to the set shown in the grid.
 Click to export data in the grid to an Excel file.
 Click to print data in the grid.
 Click to create a PDF file of grid data.
 Enter a few characters into the search box to search records in the current grid. The search will be performed automatically as soon as you stop typing. Searches are NOT case sensitive. Some searches are also approximate, for example, searching for "John" will also find "Jon".
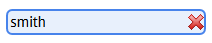 Click "X" to clear the search and show all records.
 Some column headers are sortable - click the header to sort. Some are also resizable - click the white space between header cells and drag to resize.
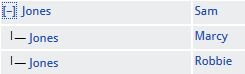
 Some columns expand and collapse to show sub-rows of data. Click the +/- sign to toggle all expandable sub-rows.
 Some individual data cells expand and collapse to show sub-rows of data. Click the +/- sign to toggle expandable sub-rows.
![]() Clicking the X icon in the delete column will delete the record. You will be prompted to confirm. Be careful - deletions cannot be un-done.
Clicking the X icon in the delete column will delete the record. You will be prompted to confirm. Be careful - deletions cannot be un-done.
![]() Some columns, such as check-boxes can be filtered. Clicking the filter icon will toggle filtering of column data.
Some columns, such as check-boxes can be filtered. Clicking the filter icon will toggle filtering of column data.
Data Forms - You must click the "Save" button to save changes you make in data forms.
 This is the currently active tab on the page.
 Inactive tab(s) on the current page. Click to switch to the other tab view(s) without re-loading the page or losing your edits.
 Saves the current entry, stays on the same page.
 Saves the current entry and returns to the previous page, unless errors are encountered.
 Saves the current entry and opens a blank form to create a new entry, unless errors are encountered. This allows for quick entry of many records.
 Cancels current entry editing and returns to the previous page.
 For guests only, saves the current entry and opens a blank form to create a new entry for another guest in the same group, unless errors are encountered. This allows for quick entry of many records for a guest group, such as a family or a couple.
 This is a typical data entry form field.
 Click the small "?" above the field for additional information about the specific field.
 This is a required data entry form field.
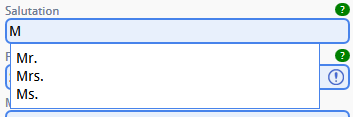 An auto-complete data entry form field allows to choose from a list of pre-defined values as well as typing in your own text.
 Red outline with exclamation sign indicates a data entry field is in error, along with a descriptive message.
Event List
Event List
- Add events by clicking "Add New". Additional events incur additional costs.
- Search the list by typing a few characters into the Search box.
- Export list to Excel by clicking "Excel".
- Print list by clicking "Print".
- Create a PDF document of the list by clicking "PDF".
- Click on a record in the list to go to that entry's detail page.
- Only one event at a time can be active. Click "Make active" to activate a specific event and deactivate all others.
Event - Basic Info
Event - Basic Info
- Enter basic information about the event.
- Return address information will be used as default on printable envelopes.
- If you will not be utilizing the Micro-Site functionality and have a web site already set up for the event, you can enter it in the Event Website field.
- Click "Save" to save data and stay on current page.
- Click "Save & Close" to save data and return to previous page.
- Click "Cancel" to discard changes and return to previous page.
Event - Venues
Event - Venues
- Add venues by clicking "Add New". Depending on the purchased event package, you will be limited to a maximum number of venues for this event.
- Search the list by typing a few characters into the Search box.
- Export list to Excel by clicking "Excel".
- Print list by clicking "Print".
- Create a PDF document of the list by clicking "PDF".
- Click on a record in the list to go to that entry's detail page.
Event - Micro-Site
Event - Micro-Site
- You can create a micro site for your event.
- Click on "?" next to each field for a detailed explanation of its functionality.
- The Site URL is automatically created for you based on the event name. It cannot be altered manually.
- Choose a large, high-resolution image to serve as the background for the micro site.
- Site HTML allows basic formatting. All scripting and other tags considered unsafe will be removed.
- You can preview the micro site at anytime while you're logged in.
- Click "Save" to save data and stay on current page.
- Click "Save & Close" to save data and return to previous page.
- Click "Cancel" to discard changes and return to previous page.
Event - Upgrade
Event - Upgrade
- If you don't already have the highest tier event package, you can upgrade to higher packages.
- Upgrading incurs additional costs, so please have a credit card ready.
- Upgrading is not eligible for refunds.
- Once an event has been upgraded, it is also no longer eligible for refunds.
- Click "Save" to save data and stay on current page.
- Click "Save & Close" to save data and return to previous page.
- Click "Cancel" to discard changes and return to previous page.
Venue - Basic Info
Venue - Basic Info
- Enter basic information about the venue.
- Venue Code is a three-character code that will be utilized throughout the application instead of using the long name to save space in worksheets and reports.
- Be sure to check "Use this venue?" if the venue is active.
- Venue address information will be used to generate a map on the "Map" tab.
- Guest and table count estimates will be used to pre-populate vendor proposals.
- Click "Save" to save data and stay on current page.
- Click "Save & Close" to save data and return to previous page.
- Click "Cancel" to discard changes and return to previous page.
Venue - Meal Choices
Venue - Meal Choices
- Add meal choices by clicking "Add New".
- Search the list by typing a few characters into the Search box.
- Export list to Excel by clicking "Excel".
- Print list by clicking "Print".
- Create a PDF document of the list by clicking "PDF".
- Click on a record in the list to go to that entry's detail page.
- Click "X" next to a record to delete it. Caution - deletions cannot be un-done!
Venue - Tables
Venue - Tables
- Add tables by clicking "Add New".
- Search the list by typing a few characters into the Search box.
- Export list to Excel by clicking "Excel".
- Print list by clicking "Print".
- Create a PDF document of the list by clicking "PDF".
- Click on a record in the list to go to that entry's detail page.
- Click "X" next to a record to delete it. Caution - deletions cannot be un-done!
Venue - Table Seating
Venue - Table Seating
- Click on the table number in the middle of the drawn table to pop up table details and a list of guests seated at that table.
- Drag guests from the Unseated Guest List to a table in the room layout to assign seating.
- Drag guests from one table to another in the room layout to re-assign seating.
- Drag guests from a table to the Unseated Guest List to remove seating assignment.
- When a guest is seated, they are automatically enabled for place card printing.
- When a guest is un-seated, they are automatically disabled for place card printing.
- Colored circle dots indicate occupied seats at a table.
- If a table is filled to capacity, no additional guests can be seated at that table.
- Add tables to the room layout by clicking "Add Table".
- Move tables around the room layout by dragging them with the move (cross arrow) handle.
- Rotate the angle of tables in the room layout by dragging them with the rotate (circular arrow) handle.
- Search the Unseated Guest List by typing a few characters into the Search box.
- Export list to Excel by clicking "Excel".
- Print the room layout by clicking "Print Layout".
- All room layout changes are automatically saved.
Venue - Place Cards
Venue - Place Cards
- Add guests by clicking "Add New".
- Search the list by typing a few characters into the Search box.
- Export list to Excel by clicking "Excel".
- Print list by clicking "Print".
- Create a PDF document of the list by clicking "PDF".
- Click on a record in the list to go to that entry's detail page.
- Check the "Print?" column to enable printing of place cards for specific guests. These will be automatically updated when guests are seated/un-seaated in the "Table Seating" tab.
- Under "Format Line 1", pick a suggested format for printing the guest name on a place card, or type in your own. If no format is specified, the system will take a best-guess at how a guest name should be printed.
- Under "Format Line 2", pick a suggested format for printing a second line on a place card, or type in your own.
- All Place Card Worksheet changes are automatically saved.
Venue - Favors
Venue - Favors
- Add favors for the venue by clicking "Add New".
- Search the list by typing a few characters into the Search box.
- Export list to Excel by clicking "Excel".
- Print list by clicking "Print".
- Create a PDF document of the list by clicking "PDF".
- Click on a record in the list to go to that entry's detail page.
- Click "X" next to a record to delete it. Caution - deletions cannot be un-done!
Venue - Favor Allocation
Venue - Favor Allocation
- Add guests by clicking "Add New".
- Search the list by typing a few characters into the Search box.
- Export list to Excel by clicking "Excel".
- Print list by clicking "Print".
- Create a PDF document of the list by clicking "PDF".
- Click on a record in the list to go to that entry's detail page.
- Check the "Alloc?" under corresponding favors column to allocate favors for specific guests. If guest information contains favor size and/or gender, and the favor is offered with specific sizes and/or genders, the system will attempt to automatically match with guest's information.
- If the favor is offered in specific sizes, check the appropriate size column for each guest.
- If the favor is offered in specific genders, check the appropriate gender column for each guest.
- If you don't see any favor columns for allocation, make sure you have added favors for this venue under the "Favors" tab.
- All Favor Allocation Worksheet changes are automatically saved.
Venue - Map
Venue - Map
- If a valid address for the venue has been added under the "Basic Info" tab, a map will be generated here.
- Right click on the Map Link below the map to copy the location URL which you can provide to your guests for directions.
- Click on the Map Link below the map to go directly to the map in a new window.
Master Guest List
Master Guest List
- Add guests by clicking "Add New".
- Search the list by typing a few characters into the Search box.
- Export list to Excel by clicking "Excel".
- Print list by clicking "Print".
- Create a PDF document of the list by clicking "PDF".
- Click [+] / [-] to expand / collapse groups of guests.
- Click on a record in the list to go to that entry's detail page.
- Click "X" next to a record to delete it. Caution - deletions cannot be un-done!
Guest - Basic Info
Guest - Basic Info
- Enter basic information about the guest.
- Salutations will be used to format Invitation, Place Card, and Thank You note formatting.
- Guest type is important and controls whether a guest is the primary for a group/family, or is attending with someone.
- Relationship to Primary Guest is required for all non-primary guests.
- Categories can be used to further filter guests on various reports. Up to three different categories can be assigned to each guest.
- Click "Save" to save data and stay on current page.
- Click "Save & Close" to save data and return to previous page.
- Click "Save & New" to save data and open a blank form to add a new entry.
- Click "Cancel" to discard changes and return to previous page.
- Click "Add + 1" to save data and open a blank form to add a new entry to the current group/family. Some data such as last name and address will carry over to the new form to speed up data entry.
Guest - Additional Info
Guest - Additional Info
- Specify to which venues this guest is invited. Defaults to all venues initially.
- Specify whether to send/print an invitation for this guest. Defaults to Yes for Primary guests, No for others.
- Enter any dietary restrictions or food allergies for the guest. You will be alerted to this when selecting meals on the RSVP Worksheet.
- Specify a size and gender for party favors, if known. This will help allocate party favors correctly on the Favor Allocation Worksheet.
- Guest numbering can be used for easy cross referencing on various reports and worksheets. Automatic numbers will be assigned, or you can enter your own.
- Click "Save" to save data and stay on current page.
- Click "Save & Close" to save data and return to previous page.
- Click "Save & New" to save data and open a blank form to add a new entry.
- Click "Cancel" to discard changes and return to previous page.
- Click "Add + 1" to save data and open a blank form to add a new entry to the current group/family. Some data such as last name and address will carry over to the new form to speed up data entry.
Guest - Others in Group
Guest - Others in Group
- Add guests in the same group/family by clicking "Add New".
- Search the list by typing a few characters into the Search box.
- Export list to Excel by clicking "Excel".
- Print list by clicking "Print".
- Create a PDF document of the list by clicking "PDF".
- Click on a record in the list to go to that entry's detail page.
- Click "X" next to a record to delete it. Caution - deletions cannot be un-done!
Category List
Category List
- Add categories by clicking "Add New".
- Search the list by typing a few characters into the Search box.
- Export list to Excel by clicking "Excel".
- Print list by clicking "Print".
- Create a PDF document of the list by clicking "PDF".
- Click on a record in the list to go to that entry's detail page.
- Click "X" next to a record to delete it. Caution - deletions cannot be un-done!
Category - Basic Info
Category - Basic Info
- Enter a name for the category.
- Specify a color for the category. Colors are used in various worksheets to easily identify guests belonging to categories.
- Click "Save" to save data and stay on current page.
- Click "Save & Close" to save data and return to previous page.
- Click "Save & New" to save data and open a blank form to add a new entry.
- Click "Cancel" to discard changes and return to previous page.
Invitation Worksheet
Invitation Worksheet
- Add guests by clicking "Add New".
- Search the list by typing a few characters into the Search box.
- Export list to Excel by clicking "Excel".
- Print list by clicking "Print".
- Create a PDF document of the list by clicking "PDF".
- Click on a record in the list to go to that entry's detail page.
- Check off which guests are invited to which venues. By default, all guests are invited to all venues when they are first added.
- Check the "Print?" column to enable printing of invitations for specific guests. This is enabled by default for all Primary guests and disabled for all others. Usually, only one invitation gets printed per group/family.
- Under "Format Line 1", pick a suggested format for printing the guest name(s) on the invitation label/envelope/export, or type in your own. If no format is specified, the system will take a best-guess at how a guest name should be printed.
- Under "Format Line 2", pick a suggested format for printing a second line on the invitation label/envelope/export, or type in your own.
- All Invitation Worksheet changes are automatically saved.
RSVP Worksheet
RSVP Worksheet
- Add guests by clicking "Add New".
- Search the list by typing a few characters into the Search box.
- Export list to Excel by clicking "Excel".
- Print list by clicking "Print".
- Create a PDF document of the list by clicking "PDF".
- Click on a record in the list to go to that entry's detail page.
- Only those guests who have been invited to at least one venue are shown on this worksheet.
- Check off which guests are coming or not and to which venues.
- If a guest RSVP'd yes, you can select their meal preference.
- If the guest has any dietary restrictions or allergies, a pop-up message will inform of that when seelcting their meal.
- Click "Reset" to clear all RSVP information for a guest.
- All RSVP Worksheet changes are automatically saved.
Attendance Worksheet
Attendance Worksheet
- Add guests by clicking "Add New".
- Search the list by typing a few characters into the Search box.
- Export list to Excel by clicking "Excel".
- Print list by clicking "Print".
- Create a PDF document of the list by clicking "PDF".
- Click on a record in the list to go to that entry's detail page.
- Only those guests who RSVP'd Yes are shown on this worksheet.
- Check off which guests attended which venues.
- All Attendance Worksheet changes are automatically saved.
Hotel Stay Worksheet
Hotel Stay Worksheet
- Add guests by clicking "Add New".
- Search the list by typing a few characters into the Search box.
- Export list to Excel by clicking "Excel".
- Print list by clicking "Print".
- Create a PDF document of the list by clicking "PDF".
- Click on a record in the list to go to that entry's detail page.
- Only those guests who RSVP'd Yes are shown on this worksheet.
- Check off which guests will be staying at hotels.
- Select a suggested hotel name from the drop list, or type in a new hotel.
- Check off whether which guests will be receiving a gift package at the hotels.
- Enter any additional comments.
- All Hotel Stay Worksheet changes are automatically saved.
Transportation Worksheet
Transportation Worksheet
- Add guests by clicking "Add New".
- Search the list by typing a few characters into the Search box.
- Export list to Excel by clicking "Excel".
- Print list by clicking "Print".
- Create a PDF document of the list by clicking "PDF".
- Click on a record in the list to go to that entry's detail page.
- Only those guests who RSVP'd Yes are shown on this worksheet.
- Check off which guests will need transportation and to which venues.
- Check off those guests who will require handicapped accomodations.
- Enter any additional comments.
- All Transportation Worksheet changes are automatically saved.
Gift Worksheet
Gift Worksheet
- Add guests by clicking "Add New".
- Search the list by typing a few characters into the Search box.
- Export list to Excel by clicking "Excel".
- Print list by clicking "Print".
- Create a PDF document of the list by clicking "PDF".
- Click on a record in the list to go to that entry's detail page.
- Only those guests who have been invited to at least one venue are shown on this worksheet.
- Check off which guests provided gifts
- Enter monetary values for checks, cash, and gift cards.
- Enter descriptions for non-monetary gifts.
- Mark whether a Thank You note has already been sent for each guest. This controls which "Thank You" labels/envelopes still need to be printed.
- Enter any additional comments.
- All Gift Worksheet changes are automatically saved.
Copy Guests From Another Event
Copy Guests From Another Event
- Select an event from which to copy to the currently active event.
- Check if you would like to invite all copied guests to all venues by default. Make sure you have all venues already defined for this to take effect.
- Check whether you would like to enable printing of invitations for all copied Primary guests.
- Check whether you would like invitation formatting to be copied from the other event for all guests.
- Check whether you would like guest numbering to be copied from the other event for all guests.
- Check whether you would like to copy categories and assign them to the copied guests as they are assigned in the other event.
- You may copy as many times from as many events as needed.
- No checking for duplicates is performed, so the copy is recommended only when starting a new event. If you already have some of the guests added, duplicate entries may be created if they already exist in multiple events.
- Click "Copy" to perform the copy task.
Import Guests From Excel
Import Guests From Excel
Note: - if you already have an import in progress, you will be brought directly to Sep 3. To start over, either finish classifying the remaining pending guests, or click "Discard All".
Step 1 - Specify import file and options- Select an Excel file to import.
- Check if you would like to invite all imported guests to all venues by default. Make sure you have all venues already defined for this to take effect.
- Check whether you would like to enable printing of invitations for all imported Primary guests.
- Check whether the first row in the Excel file contains field names.
- Make sure to go over the checklist and verify that the Excel file you are importing complies with it!
- No checking for duplicate is performed, so the import is recommended only when starting a new event. If you already have some of the guests added, duplicate entries may be created if they already exist in the currently active event.
- Click "Next" to continue to Step 2.
- Top of the page contains a preview of the imported Excel rows. Double check to make sure it looks correct.
- Bottom of the page contains available destination fields.
- Drag appropriate source fields from the top row to their corresponding destination fields in the bottom row.
- Make sure the "Required" fields have been mapped. All other fields are optional.
- Click "Next" to continue to Step 3.
- The list contains all of your pending imported guests.
- The list can be searched by typing a few characters in the Search box.
- Classify each pending imported guest as either Primary, With Someone, or Discard.
- Recommendation - classify all guests you categorize as primary first, so that other guests with them can be properly linked together.
- When classifying as "With Someone", a pop-up will appear asking to choose a relationship to the Primary guest as well as which Primary guest should be linked. Guests with the same last name are suggested at the top of the Primary Guest list in the pop-up.
- Classifying as "Discard" will NOT import that guest.
- As each guest is classified, they will be removed from the pending list.
- Click "Finish" to complete the Import.
- Click "Discard All" to discard all remaining pending imported guests.
Vendor List
Vendor List
- Add vendors by clicking "Add New".
- Search the list by typing a few characters into the Search box.
- Export list to Excel by clicking "Excel".
- Print list by clicking "Print".
- Create a PDF document of the list by clicking "PDF".
- Click on a record in the list to go to that entry's detail page.
- Click "X" next to a record to delete it. Caution - deletions cannot be un-done!
Vendor - Basic Info
Vendor - Basic Info
- Enter general name, address, and contact information for the vendor.
- Click "Save" to save data and stay on current page.
- Click "Save & Close" to save data and return to previous page.
- Click "Save & New" to save data and open a blank form to add a new entry.
- Click "Cancel" to discard changes and return to previous page.
Vendor - Proposals
Vendor - Proposals
- Add vendor proposals by clicking "Add New".
- Search the list by typing a few characters into the Search box.
- Export list to Excel by clicking "Excel".
- Print list by clicking "Print".
- Create a PDF document of the list by clicking "PDF".
- Click on a record in the list to go to that entry's detail page.
- Click "X" next to a record to delete it. Caution - deletions cannot be un-done!
Vendor - Payments
Vendor - Payments
- Add vendor payments by clicking "Add New".
- Search the list by typing a few characters into the Search box.
- Export list to Excel by clicking "Excel".
- Print list by clicking "Print".
- Create a PDF document of the list by clicking "PDF".
- Click on a record in the list to go to that entry's detail page.
- Click "X" next to a record to delete it. Caution - deletions cannot be un-done!
Vendor - Documents
Vendor - Documents
- Add vendor documents by clicking "Add New".
- Search the list by typing a few characters into the Search box.
- Export list to Excel by clicking "Excel".
- Print list by clicking "Print".
- Create a PDF document of the list by clicking "PDF".
- Click on Description in the list to go to that entry's detail page.
- Click on Document Link in the list to download and open that specific document.
- Click "X" next to a record to delete it. Caution - deletions cannot be un-done!
Vendor Proposal - Basic Info
Vendor Proposal - Basic Info
- Enter name, date, and proposer name for the proposal.
- Reference number can be used to refer to the vendor's contract or document number.
- Leave "Include in Budget" checked to automatically add this proposal to the budget.
- Select the venue and category for the proposal. If the budget doesn't already have these line items and "Include in Budget" is checked, they will be added automatically.
- Estimated number of guests and tables will initially be populated from the Venue information, if provided when the venue was defined.
- Enter any additional costs.
- Total cost will be calculated automatically based on all other costs in the proposal.
- Click "Save" to save data and stay on current page.
- Click "Save & Close" to save data and return to previous page.
- Click "Save & New" to save data and open a blank form to add a new entry.
- Click "Cancel" to discard changes and return to previous page.
Vendor Payment - Basic Info
Vendor Payment - Basic Info
- Enter payment description, type, and method.
- If the payment has not been made yet, you can enter scheduled date and amount.
- If the payment has already been made, you can enter paid date and amount.
- Leave "Include in Budget" checked to automatically add this payment to the budget.
- Select the venue and category for the payment. If the budget doesn't already have these line items and "Include in Budget" is checked, they will be added automatically.
- Click "Save" to save data and stay on current page.
- Click "Save & Close" to save data and return to previous page.
- Click "Save & New" to save data and open a blank form to add a new entry.
- Click "Cancel" to discard changes and return to previous page.
Vendor Document - Basic Info
Vendor Document - Basic Info
- Enter document description.
- Click the Document File Browse button to upload the document from your device.
- Click "Save" to save data and stay on current page.
- Click "Save & Close" to save data and return to previous page.
- Click "Save & New" to save data and open a blank form to add a new entry.
- Click "Cancel" to discard changes and return to previous page.
Budget
Budget
- Add budget categories by clicking "Add New".
- If you have created vendor proposals or payments, those budget categories may have already been added automatically.
- Budget entries are grouped by venue and category. Items can also be attrubuted as applying to all venues.
- Print list by clicking "Print".
- Create a PDF document of the list by clicking "PDF".
- Click on a record in the list to go to that entry's detail page.
- Click "X" next to a record to delete it. Caution - deletions cannot be un-done!
- When a budget line item is deleted, associated vendor porposals and payments in that venue/category will not longer show up in the budget.
Budget Category - Basic Info
Budget Category - Basic Info
- Enter Venue, Category, and Budget Amount.
- If the line item applies to the entire event and is not specific to any venue, select "Applies to all venues" in the Venue drop-down.
- Click "Save" to save data and stay on current page.
- Click "Save & Close" to save data and return to previous page.
- Click "Save & New" to save data and open a blank form to add a new entry.
- Click "Cancel" to discard changes and return to previous page.
Copy Vendors From Another Event
Copy Vendors From Another Event
- Select an event from which to copy to the currently active event.
- You may copy as many times from as many events as needed.
- No checking for duplicates is performed, so the copy is recommended only when starting a new event. If you already have some of the vendors added, duplicate entries may be created if they already exist in multiple events.
- Click "Copy" to perform the copy task.
To-do Task List
To-do Task List
- Add tasks by clicking "Add New".
- Search the list by typing a few characters into the Search box.
- Export list to Excel by clicking "Excel".
- Print list by clicking "Print".
- Create a PDF document of the list by clicking "PDF".
- Click on a record in the list to go to that entry's detail page.
- Click "X" next to a record to delete it. Caution - deletions cannot be un-done!
To-do Task - Basic Info
To-do Task - Basic Info
- Enter task name and due date.
- If you would like a specific reminder time frame other than the default, select Reminder Days. This controls when the task will appear in the "Tasks Due Soon" section of the Dashboard.
- Mark the task "Complete" if it has been completed.
- Click "Save" to save data and stay on current page.
- Click "Save & Close" to save data and return to previous page.
- Click "Save & New" to save data and open a blank form to add a new entry.
- Click "Cancel" to discard changes and return to previous page.
Notes
Notes
- Notes can be added on any page in the application where a yellow sticky note icon appears.
- Notes are specific to the page and data record on that page. For example, a note can apply to the entire Guest List, or it can apply to a specific guest on that list.
- Search the list by typing a few characters into the Search box.
- Export list to Excel by clicking "Excel".
- Print list by clicking "Print".
- Create a PDF document of the list by clicking "PDF".
- Click on a record in the list to go to that entry's detail page.
Calendar
Calendar
- To view a different month, click the selector drop-downs for Year and Month, or use the "<<" and ">>" arrows.
- Add tasks by clicking "Add New".
- Print the calendar by clicking "Print".
- Create a PDF document of the calendar by clicking "PDF".
- Click on a link in the calendar to go to that entry's detail page.
- Tasks / Notes that have been completed will show with a strike-through line.
Report Specification
Report Specification
- If applicable, select Venue filter.
- If applicable, select Category filters.
- If applicable, select Guest Type filters.
- If applicable, select any other available filters specific to the report.
- Select the desired output file format for the report.
- Select the desired page orientation.
- Click "Submit" to generate the report.
- A "No data for report!" message usually indicates that either the filters are too restricitve, or there is no available data.
Label Specification
Label Specification
- Pick a Label Manufacturer.
- Select the appropriate Label.
- Label Details will be retrieved and displayed.
- Select a Font and Font Size.
- Sample preview at the bottom of the page will reflect all changes automatically.
- Select the Print Direction. This controls whether the labels print in sequence as first across then down, or first down then accross.
- If you are using a partially printed label sheet as your first sheet, you can set the starting label in the Page Layout. That will be the position of the first printed label on the first page, taking into account Print Direction. This helps to eliminate wasted labels.
- If applicable, select a Venue for Place Card Labels.
- If applicable, select a Venue and Favor for Favor Labels.
- Print Selections allows to print all labels or only for specific guests.
- Category filters will further narrow down which labels are printed.
- If applicable, you can have state names printed as abbreviated (ex. NY) or expanded (ex. New York) for address labels.
- Click "Create PDF" to generate a printable PDF file of labels.
- A warning message will instruct you to avoid any scaling options when printing the PDF file to preserve correct sizing and alignment.
Envelope Specification
Envelope Specification
- Select the Unit of Measure for the envelope.
- Specify the Width and Height.
- Select a Font and Font Size.
- Sample preview at the bottom of the page will reflect all changes automatically.
- Print Selections allows to print all envelopes or only for specific guests.
- Category filters will further narrow down which envelopes are printed.
- You can have state names printed as abbreviated (ex. NY) or expanded (ex. New York).
- If you would like to print a return address, check the box. You can also edit the return address.
- Click "Create PDF" to generate a printable PDF file of envelopes.
- A warning message will instruct you to avoid any scaling options when printing the PDF file to preserve correct sizing and alignment.
